Start Strong: Explore Without Getting Lost
Well Dweller rewards curiosity, but you do not need to clear every obstacle when you first see it. The best way to progress is knowing when to explore, when to mark a route for later, and when to follow the main objective.
Glimmer begins with limited movement, so unreachable ledges and sealed paths usually require an ability you have not found yet. Mark them, continue through the current region, and return after gaining a new movement tool.
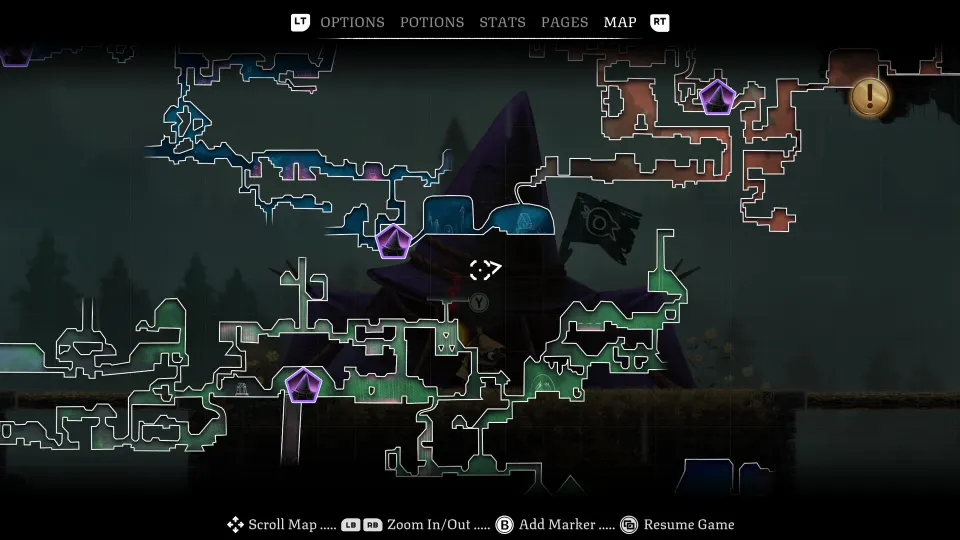
Enable the minimap in the Gameplay settings early. It makes room exits and unexplored branches easier to spot without constantly opening the full map.
| Situation | Best response | Why it helps |
|---|---|---|
| A ledge is out of reach | Mark it and continue | A later ability may solve it |
| You cannot find the story route | Buy an objective marker at a tent | It directs you toward progress |
| A collectible is behind a barrier | Add a personal marker | You can revisit it later |
| A room seems complete | Check for unvisited exits | Markers only help in visited rooms |
Use map markers freely. A locked-area symbol means something is locked in that room, but the switch or answer may be elsewhere. Do not spend too long attacking every wall for a missing mechanism.
Tents are more than checkpoints. They save progress, offer services, and become fast-travel locations once Tent Travel is unlocked. Save at every new tent before pushing into an unfamiliar area.
A reliable early progression route is:
- Cross Night Garden and Hunter's Cabin to retrieve food for Mother.
- Defeat the Groundskeeper and meet Looter.
- Continue through The Bog for Climb and Tent Travel.
- Explore The Drains for Wind Ride and elevator parts.
- Complete major quests, rescues, bosses, and Golden Feather events.
- Return to Queen's Castle with seven Golden Feathers.
Get More From Movement Abilities
Movement becomes easier when abilities are treated as combinations instead of separate tools. Later platforming routes often expect you to chain jumps, climbing, slides, and the matchstick slingshot.
Climbing consumes stamina, but wall-jumping does not. If a vertical route drains your stamina, climb only when you need precision, then jump away and back to gain height. Save sustained climbing for sections where it is truly necessary.
The Slingshot has a useful second step: throw the matchstick into a wall, then bounce from it for more height. This can turn a seemingly impossible ledge into a reachable route.
| Ability | Core use | Helpful follow-up |
|---|---|---|
| Slingshot | Throw the matchstick | Bounce from the lodged matchstick |
| Climb | Scale straight walls | Wall-jump to save stamina |
| Tent Travel | Travel between tents | Revisit marked routes quickly |
| Wind Ride | Travel through wind currents | Hold jump when needed |
| Hover | Cross wider gaps | Find feathers for longer airtime |
| Soar | Reach late-game routes | Finish endgame cleanup |
Sliding is also a defensive ability. It gives Glimmer a short invulnerability window, so sliding through a committed attack can be safer than jumping away. It often leaves you behind an enemy with time to counterattack.
Use the look control when a route is unclear. Look below before dropping from a platform or ladder, and look ahead before spending stamina on a difficult climb. A hidden passage or safer landing may already be visible.
Fight Safely and Use Resources Often
Combat is easy to understand, but careless attacks can cost a lot of health. Watch unfamiliar enemies before rushing in. Many telegraph attacks with sounds and visible signals, while some enemies continue attacking or explode after taking fatal damage.
Terrain is a major advantage. Enemies that attack on one level may be vulnerable from above or below, while ranged enemies can be studied from safer platforms. Use elevation to learn an attack pattern before committing.
| Tool or habit | Best use | Common mistake |
|---|---|---|
| Slide | Pass through committed attacks | Treating it only as travel |
| Flaming Vessel | Add boss damage | Saving charges too long |
| Oil Vial | Heal and gain an attack boost | Healing only at critical health |
| Matchstick attack | Recharge Vessel energy | Ignoring safe openings |
| Terrain | Limit enemy options | Fighting every foe head-on |
The Flaming Vessel should be used regularly. Melee hits recharge it, creating a useful combat cycle rather than consuming a rare emergency resource. You can also strike a thrown Vessel in the air to send it farther toward an enemy group or boss.
For bosses, learn patterns before chasing damage. Test whether jumping or sliding gives the safer response to a new attack. Bosses reduce some bonus-damage effects, so builds that erase normal enemies may not feel equally powerful in an arena.
Oil Vials are useful before a dangerous phase, not just when health is nearly gone. Reigniting the matchstick restores health and gives a temporary offensive benefit, letting you turn a safe opening into meaningful damage.
If a fight blocks progress, use assist settings during gameplay. You can increase attack power, reduce incoming damage, simplify healing input, or add time to timed events. These settings can be changed whenever needed and do not block achievements.
Spend Currency and Trinket Slots Carefully
Looter becomes available after Hunter's Cabin and is an important source of survivability and build flexibility. Currency comes from defeated enemies, but early spending should prioritize practical upgrades.
An extra Oil Vial charge is expensive but makes bosses and long exploration routes far more forgiving. Trinket Slots are another strong purchase because they let you combine effects instead of constantly swapping equipment.
| Purchase priority | Why it matters | When to delay it |
|---|---|---|
| Glass Eye | Reveals hidden routes | If exploring blind is preferred |
| Extra Oil Vial charge | Gives room for mistakes | If healing is not a problem |
| Trinket Slots | Supports flexible builds | Until healing needs are covered |
| Vessel upgrades | Improves burst damage | If Vessels go unused |
| Currency Trinkets | Helps with farming | Outside dedicated farming runs |
The Glass Eye is a strong early exploration trinket because it helps hidden routes stand out from normal walls. Use the Slingshot to test suspicious openings too, especially before descending a ladder or one-way route.
Do not expect one currency trinket to transform your income. Their effects become more noticeable when several economy-focused pieces are equipped together. Use that setup for farming, then switch back to combat or exploration tools for dangerous areas.
Workshop Tokens upgrade trinkets without increasing their slot cost. If a trinket already fits your build, improving it will not make it harder to equip.
For late-game cleanup, consider holding some currency. Queen's Coin lowers several costs, including collectible markers and trinket upgrades.
Golden Feathers and Post-Game Progress
Golden Feathers are the main story gate. They come from major events rather than random pickups, so a low count means you should pursue unfinished quests and bosses instead of searching ordinary rooms.
| Golden Feather event | What to do |
|---|---|
| Lady of the Drains | Repair the elevator and defeat the boss |
| Shrine of the Seven Sons | Complete the shrine objective |
| Starsinger | Finish the associated event |
| Rebuilding Lutter | Complete the rebuilding quest |
| Squinton's birthday party | Finish the party sequence |
| Forest King | Resolve the major encounter |
| Webdrench Inn | Complete the inn event |
Queen's Castle opens only at 7/7 Golden Feathers. You do not need every Trinket, Spirit, Page, or upgrade before entering. Continue through the castle, defeat the Silver Doll, and confront the Queen.
After the credits, reload the same save. A new castle route grants Soar and reveals five Spirit Fragment objectives around the kingdom. Completing them leads to Reunite the Flock, while Soar makes collectible cleanup much easier.
FAQ
What are the most useful well dweller tips for beginners?
Turn on the minimap, save at every tent, mark unreachable routes, buy practical upgrades, and use slide invulnerability during combat.
Why is Queen's Castle still closed?
You need all seven Golden Feathers. Check major quest events, including Lady of the Drains, Forest King, Webdrench Inn, and the other Feather objectives.
Should I collect everything before fighting the Queen?
No. Beating the Queen unlocks Soar, which makes late-game exploration and collectible cleanup easier.
How do I beat difficult bosses?
Study attack patterns, use terrain and slide invulnerability, throw Flaming Vessels when charged, and heal before a dangerous phase when the attack boost can create a safe damage window.